More "Grungy Brushes"
If you have not already read Máirín's nice tutorial about Grungy Brushes, published recently on the Red Hat Magazine, go and read it now before continue reading this. I skip here a lot of steps and present only part of the workflow.
I will explore a more simplified (and probably not that good looking) way to do it, using only vector graphics for path generation.
- Fire Inkscape, of course, this is the tool we will use
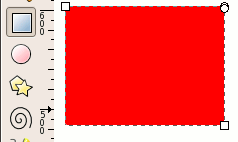
- Draw a rectangle, al large as you want. I made it red only for visual feedback in the next step.
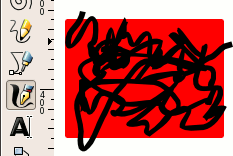
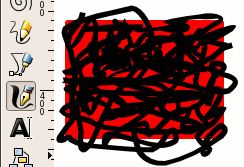
- Switch to the calligraphic tool and draw randomly until you cover the rectangle but leave a lot of gaps, we will use only the gaps. Make sure you have one single path, otherwise select the paths and do a union (Path > Union).
- Select the the chaotic path and the rectangle and perform a difference (Path > Difference). After that break it (Path > Break Apart).
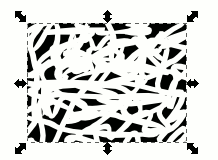
- Optionally, if the blobs are too big make them smaller using inset (Path > Inset) and if they are too complex simplify (Path > Simplify).
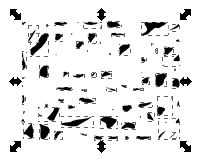
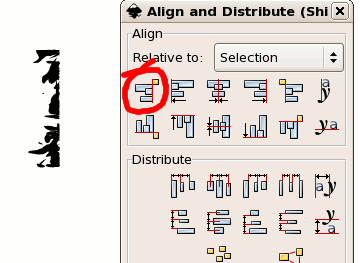
- Now, just as Máirín did, use the Align and Distribute dialog to move them around.
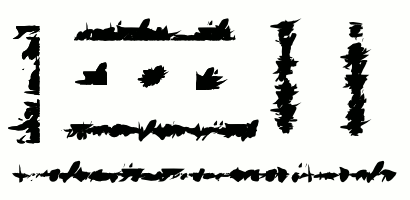
- And go wild with a lot of crazy shapes:
- As shown in the tutorial, export as PNG, import into GIMP, flatten image, convert to grayscale and save as brush (.gbr).
I think at another possible approach which would not use a rectangle and difference, but the bucket fill from the Inkscape development branch, but for now I will limit to tips and tricks about the stable version.
If you didn't read the tutorial before, I hope I got you interested, so go read it now!
![]()


The page I went to said:
ReplyDelete"You can leave comments, complaints, suggestions, praises on my blog."
So I'm leaving my humble praises. Thanks for the tip. :)
Which are appreciated...
ReplyDeleteNice Job, very helpful. I'm gonna be busy creating brushes for the next few hours
ReplyDeleteMT